From the casual to the professional photographer, Kauai is an outstanding place to make some great and memorable pictures. I’ve learned a few things while photographing something almost every day here. Some tips:
SAFETY FIRST
There are a thousand ways, big and small, to be seriously or fatally injured here, so safety must be top of mind. A few of my simple rules:
Pay attention and use common sense. It’s easy to gawk at the scenery and be tripped up by a tree root, a patch of loose dirt, a protruding rock, etc. Heed warning signs. Don’t venture off trail. Wear appropriate footwear, like grippy close-toed hiking shoes.
Plan ahead, especially for a hike. Consult a guide book or ask locals about where you plan to go. Check the weather, as a quiet trail may turn into a raging torrent or muddy quagmire in minutes. Carry plenty of water. I always take a trekking pole for extra balance. A wide brimmed hat to protect against sun is highly recommended.
Know your limits. Trail elevations can rise and fall by hundreds of feet. Steep rocky descents are tough on the knees, and the climb back up can be grueling. Distribute what you are carrying for a low center of gravity.
This Ocean. Please read the previous entry about staying safe around the water.
GEAR
Cameras and Lenses
In my experience, lighter is better. A cellphone camera is perfect in that regard. I previously used full-frame DSLR gear and switched to mirrorless bodies to be lighter and more nimble. Anyway, here is what I would bring for a couple of weeks’ stay:
Your favorite camera body, and if it’s weather-sealed, all the better.
A mid-range telephoto lens, ranging from fairly wide to a bit of telephoto reach. For example, the Canon 24-105mm f4.0 is perfect. I most frequently use an equivalent 28-80mm f2.8 lens. The mid-range lens will cover 95% of the subject matter.
Use a lens hood to guard against sun flare, and protect the front of the lens.
A circular polarizing filter is highly recommended. There are typically bright sun, clouds, and lots of reflection from water, sand, and foliage. A CPR filter helps tame the extremes for more balanced contrast and vivid colors.
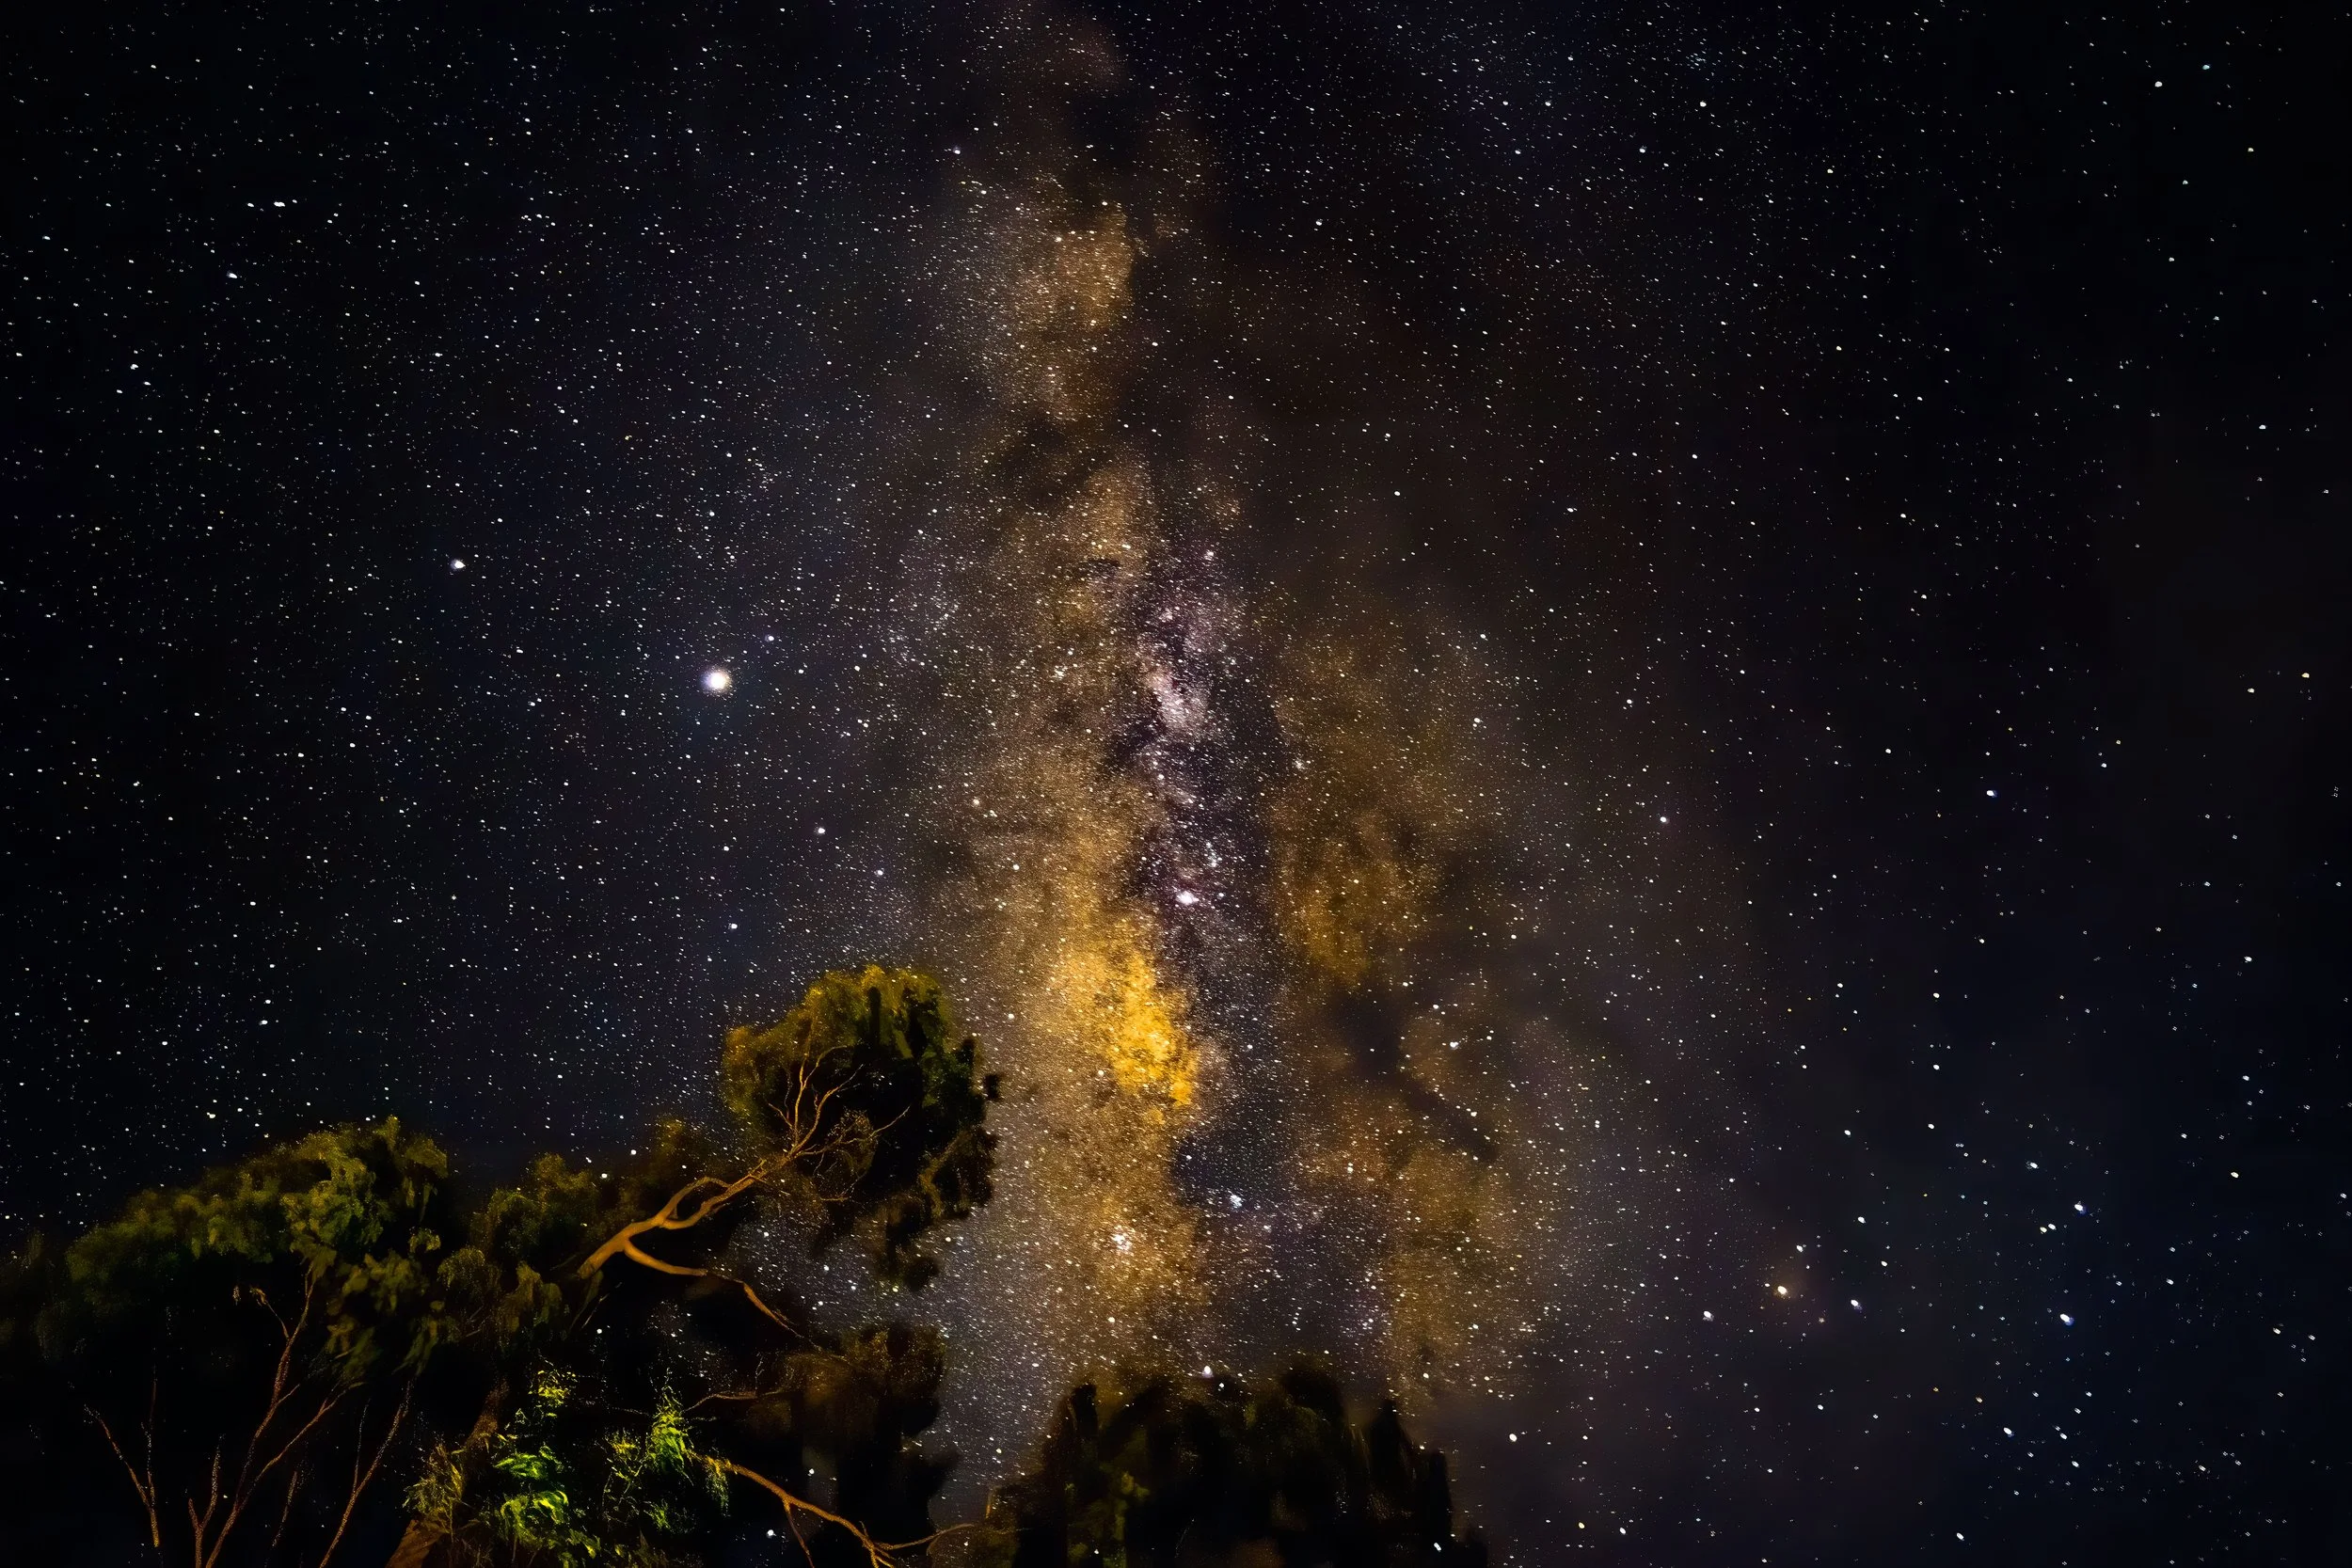
To photograph the Milky Way, a wide fast lens is needed. I use an equivalent 24mm f2.0 lens that works very well. Any lens between 16mm and 30mm and no slower than f2.8 can work. A tripod is needed. If you can’t bring a tripod, Kauai Photo Tours in Kapa’a rents tripods and other equipment.
Underwater: I use an Olympus Tough TG-6. GoPro’s are also popular.
Please leave the drone at home. They’re annoying and not allowed in many places.
Packs and Such
For hiking and general safety, I want two hands free. I use a Mountainsmith hip pack that is flexible and roomy enough for day trips. It can also be worn as a shoulder bag. The hip pack keeps a lower center of gravity. It can hold 2 water bottles but I prefer a CamelBak-type light vest to help distribute weight. I use a trekking pole or monopod for extra balance. A small first aid kit, energy bar, microfiber cloth, and a small tube of SPF50 sun block are good adds.
Clothing & Other
Wear sturdy close-toed shoes. Have extra shoes or slippers (flip-flops) in the car if the shoes get muddy. Good quality polarized sunglasses are a must. I keep a rain jacket and an old beach towel or two in the car in case of unexpected rain. Some days can be windy, foggy, and cold in higher altitudes. I keep disinfectant wipes and paper towels in the car for when I have to use a park restroom or port-a-pot. Restrooms can be scarce so be prepared. Don’t forget the wide-brimmed hat.
SETTINGS
Making good pictures in Hawaii is not confined to just the “golden hour” or sunsets. Some of the most vivid ocean colors happen when the sun is high overhead. Assuming you have a camera with some controls, here are a few basic settings.
General Walking Around / Landscape. Use Aperture priority. Auto ISO or ISO 100 or 200. Aperture at f8.0. Shutter speed at 1/125 to 1/250 second. Auto white balance. Don’t forget the circular polarizer filter! And use the lens hood!
Ocean / Breaking Waves. Use Shutter priority. Use 1/250 to 1/500 second to capture fine detail. Use 1/160 second for a slightly more silky effect. These settings also work for waterfalls. To capture surfers in action, use 1/1000 second shutter. Auto ISO and auto white balance generally work. Watch the waves - they can run up the beach and knock you down faster than you can escape!
Na Pali Coast from a Boat. Use Shutter priority. Use 1/500 second or faster to compensate for the motion of the boat. Have a dry bag to stash your gear when things get wet!
Pictures from a Helicopter. For best visibility, take a doors-off flight. Use a wide angle lens. Use Shutter priority at 1/2000 second shutter speed. Shoot below the rotors! Check some shots to be sure the rotors are not in the frame! I like mid-afternoon flights while the sun is still high and the landscape is evenly lighted.
Waimea Canyon / Na Pali Lookouts. Clouds are good - they create contrast and depth. A high bright cloudless sky is the worst photography day! Use aperture priority around f8.0, auto ISO and auto white balance. These are perfect places for panoramic shots! If the lookouts are obscured by clouds, just be patient. Usually within a few minutes the fog will blow out and give you a bright picture, sometimes with a rainbow! Patience pays off!
Flowers. A rainy or cloudy day is perfect for flowers and foliage. The colors are deeper and smoother. Use aperture priority and shoot wide open, like f2.8 or f4.0. Get up close to let the camera see details that our eyes often miss! The orchid garden at Kiahuna Plantation Gardens is great on an overcast day. The water lilies and lotus flowers at the front of the National Tropical Botanical Garden can also be exceptional.
Sunset. Biggest tip: Don’t leave too soon! The best color often happens 5 or 10 minutes after the sun sinks below the horizon. And look back east - clouds may be glowing with reflected light.
Stars / The Milky Way. Use a wide angle, fast lens, with the camera on a tripod. Manually focus the lens to or near infinity (∞). During the peak summer months, the Milky Way rises in the south and migrates toward the west during the night. Open the lens to its widest aperture. Set the exposure time for 20 seconds; set the ISO at 2000; set the white balance for Daylight. Use the camera’s shutter delay for a few seconds to avoid any shake and then don’t touch the camera for 20 seconds! Take a couple of test shots and adjust the ISO and/or exposure time to get the right balance between bright stars and dark sky. It can be really dark - watch your step!
COMPOSITION
My best advice to achieve memorable pictures: Slow Down! Take a deep breath and absorb the sight, sound, smell of a location, and what attracts your attention, before pulling out the phone or camera. For landscapes, an object in the foreground helps create perspective and depth. For big vistas, I like to include a person or two to help define the scale. Move the camera low for a different view. And turn around - sometimes the best shots are behind you!
POST PROCESSING
I shoot in camera RAW for maximum flexibility to craft the picture. If you use Adobe Lightroom / Photoshop, I import RAW files with an Adobe Landscape preset. It seems to compliment the light and color here, and is a good starting point.
LOCAL CULTURE
The Spirit of Aloha can mean many things but the basic idea is Don’t Be a Jerk! Be respectful, kind, courteous, helpful, humble and appreciative. Tip generously. Drive patiently - there is really only one two-lane road to traverse the island. Don’t park in stupid places. Whatever you bring in, take it all back out again. Don’t trespass. Reusable water bottles are better than single use flats from Costco! Local fruits and veggies are great - look for a farmers’ market. Don’t sit on a gorgeous beach, staring at your phone! Slow down, take deep breaths, and enjoy the moment. And take time to get at least an overview of the history of Hawaii - a little knowledge can add a lot to your visit.